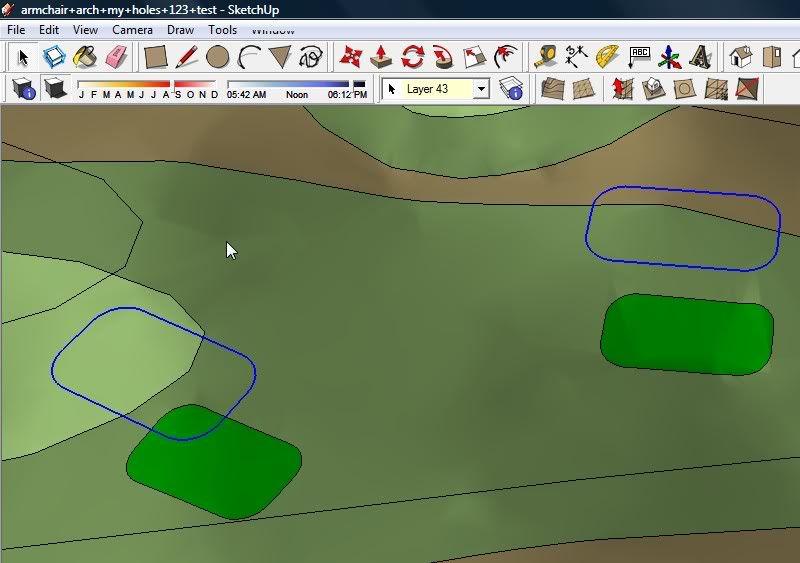
News:

This discussion group is best enjoyed using Google Chrome, Firefox or Safari.


Jim Colton

Re: It's time for some Armchair Architecture
« Reply #25 on: September 13, 2008, 12:03:44 AM »
Well, I won't be quitting my day job anytime soon.  I don't know how you guys (the pros) do it.

  Jim


Charlie Goerges

  • Karma: +0/-0
Re: It's time for some Armchair Architecture
« Reply #26 on: September 13, 2008, 12:12:12 PM »
Hey Jim, you've got to post some ground-level pics too. It's fun to see what things will look like from other angles. If you need a few tips on using sketchup, let us know.

I think that par 3 looks interesting. It would be cool to see it in 3D. The par 4 I'm having a harder time visualizing. I am not sure if the entire landing area to the right (from the tee) would be blind or not. If you need a hand with getting the 3D views, you could email me the file at ccgoerges at hotmail.com. Make sure to switch the at to @ and remove the spaces.

And everyone who's interested, I'll hopefully post some info on getting a more sculpted look (on things like tees, bunkers etc.) later on today.
Severally on the occasion of everything that thou doest, pause and ask thyself, if death is a dreadful thing because it deprives thee of this. - Marcus Aurelius

Ian_L

  • Karma: +0/-0
Re: It's time for some Armchair Architecture
« Reply #27 on: September 13, 2008, 01:24:20 PM »
Update on hole #3:

I've toned it down a bit with the bunkers (6 instead of 12), hoping to keep most of the strategy of the hole.  I opened a very narrow corridor on the left to tempt hitters to run one between the hill and the bunker.  More room between the bunkers might tempt some players to shoot for gaps between them.  Does it still look too cluttered?

Speaking of cluttered, on our next attempts we may want to start a new thread so readers don't have to look through the whole thread. ;)

EDIT: forgot the pics!

Overview:


Tee view:


Fariway view:

« Last Edit: September 13, 2008, 01:34:46 PM by Ian_Linford »

Charlie Goerges

  • Karma: +0/-0
Re: It's time for some Armchair Architecture
« Reply #28 on: September 13, 2008, 02:21:44 PM »
Ian, I think it's looking good, I like fewer bunkers for sure. I think the routing is terrific (as before). The carry to drive the green is just about perfect for a big hitter and the hole just plain looks cool. Did you narrow the green some, or is it just an optical illusion? I will say that I think you could consolidate some bunkers (basically making them bigger), but that is just how my eye sees it. One issue may be the problem of sketchup not showing smaller, suble features as well.  In that case, the images could benefit from some spicing up especially for the bunkers. To that end, I'll do my damned-est to get a short tutorial about sculpting things a bit in sketchup added to this thread today. This will make the shadows fall better across the bunkers and make them look more realistic.

RE a new thread; I kind of like having it all in one place (so I can go back and compare to previous images), but you are right about having to scroll through all of the pictures; a major pain. When will the thread jump to a second page? I think that would help. If that doesn't seem like enough improvement in readability then a second thread is fine by me.
Severally on the occasion of everything that thou doest, pause and ask thyself, if death is a dreadful thing because it deprives thee of this. - Marcus Aurelius

Ian_L

  • Karma: +0/-0
Re: It's time for some Armchair Architecture
« Reply #29 on: September 13, 2008, 02:37:40 PM »
The green is the same, although I did put the greenside bunker a bit closer to the green.  I'll try bigger bunkers, although I'm not sure I'm going to like the look.  Worth a shot, though.

Looking forward to trying to modify the bunkers  8)

I think the 30th reply might start a new page, but I'm not sure on that...

Jim Colton

Re: It's time for some Armchair Architecture
« Reply #30 on: September 13, 2008, 03:22:35 PM »
Hey Jim, you've got to post some ground-level pics too. It's fun to see what things will look like from other angles. If you need a few tips on using sketchup, let us know.

I think that par 3 looks interesting. It would be cool to see it in 3D. The par 4 I'm having a harder time visualizing. I am not sure if the entire landing area to the right (from the tee) would be blind or not. If you need a hand with getting the 3D views, you could email me the file at ccgoerges at hotmail.com. Make sure to switch the at to @ and remove the spaces.

And everyone who's interested, I'll hopefully post some info on getting a more sculpted look (on things like tees, bunkers etc.) later on today.

Charlie,

  I just now found the Drape tool, but for some reason I can't get it to work on my mac.  I'll try it on Windows.  On the par 4, I tried to make it so if you hit over the blind side on the right and carried it, it would be narrower but you'd have a good angle to the green.  Otherwise you hang back on the left and have to carry over the bunker.  The par 3 is a little short iron shot, all carry or take it on right-to-left off the slope.

  Good fun.  I don't know how they do this stuff in real life.  I have no idea how one gets the most out of a given property.  That's probably why I pay to play em instead of the other way around.

Charlie Goerges

  • Karma: +0/-0
Re: It's time for some Armchair Architecture
« Reply #31 on: September 13, 2008, 05:00:45 PM »
Okay, we’ll start with the simplest change to make to your holes, if you’ve already created them. We’ll raise the teeboxes slightly and set it up so that the hitting areas are flat using the Stamp tool.

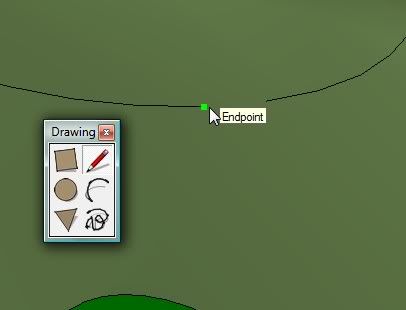
First, explode your hole outlines (so they are no longer grouped). This may take a couple of steps, depending on how you grouped things.  What you want is a highlighted outline with no bounding box. An example is shown below.


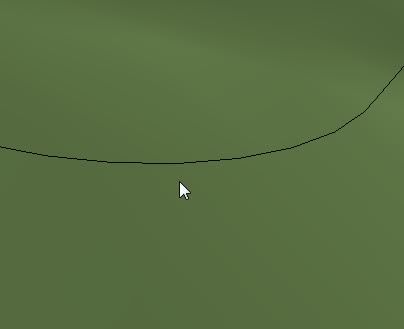
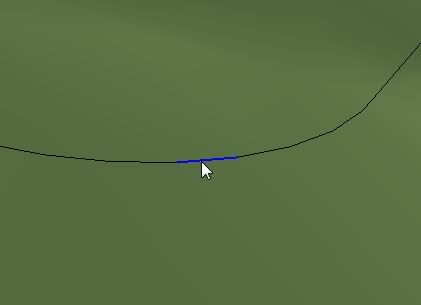
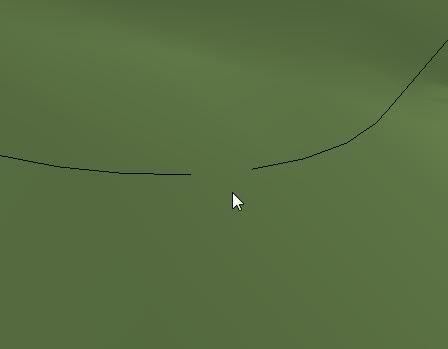
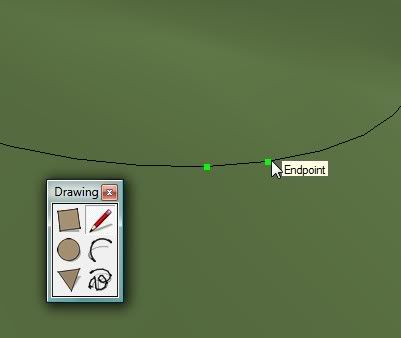
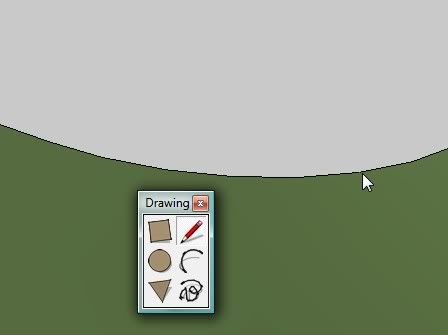
Now, in order to use the stamp tool, you need to have a face rather than just an outline on your tee box, so to do that delete a line on the tee box and then re-draw it. Hopefully the sequence below will make it clear. Also note that all lines are straight in sketchup, even curving lines are just a series of connected straight lines. Also, my screencap program won’t capture the actual mouse icon, but for the last part I am using the line tool.
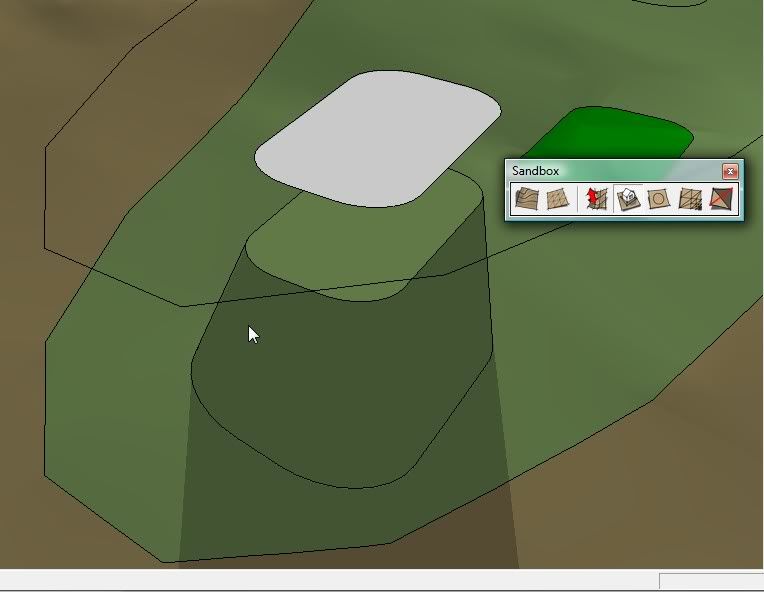


Now select the stamp tool (I’ve undocked the sandbox tools palette to keep the images smaller). Then hover over the tee box image as shown below. Then single-click the image. A red outline should appear around the face of your tee-box. The amount of offset is shown in the lower-right corner of the window.


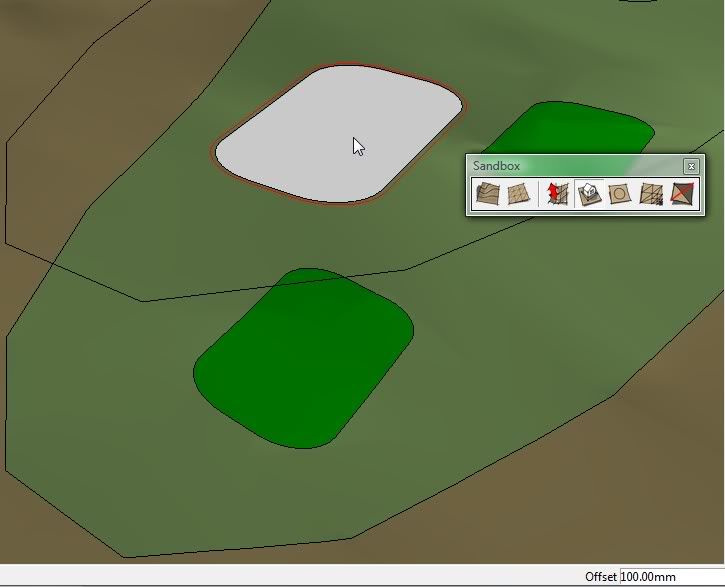
In this case it is 100 which is probably too little considering how high up I’ll need to raise it to make sure it’s flat and above grade. Too little offset would leave the sides of the teebox too steep. So I’ll just type 1000 and hit enter without ever moving the mouse. You’ll notice the red offset line has expanded and the new value is displayed in the lower-right.


Now click on the surface and wait. Once the calculations are complete, you’ll see something like below.


Now you need to choose the vertical offset, drag up and down until it looks right to you.
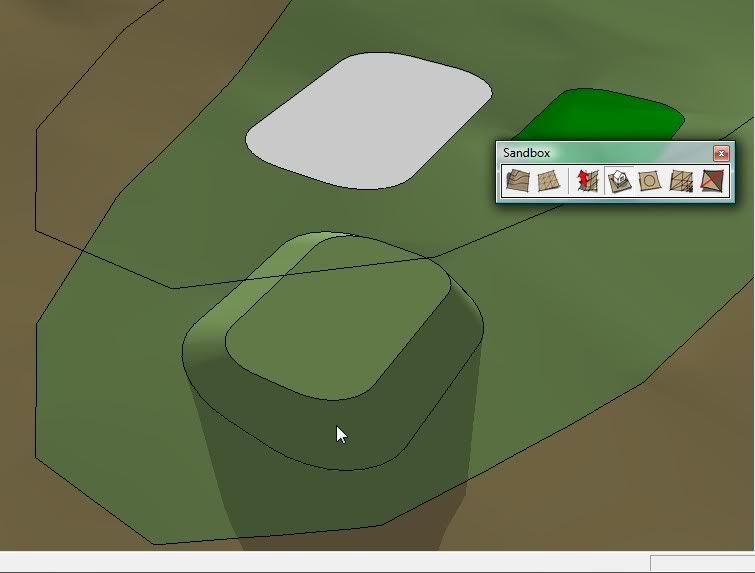


Now I’ll zoom in and rotate/pan to show a better view (below).


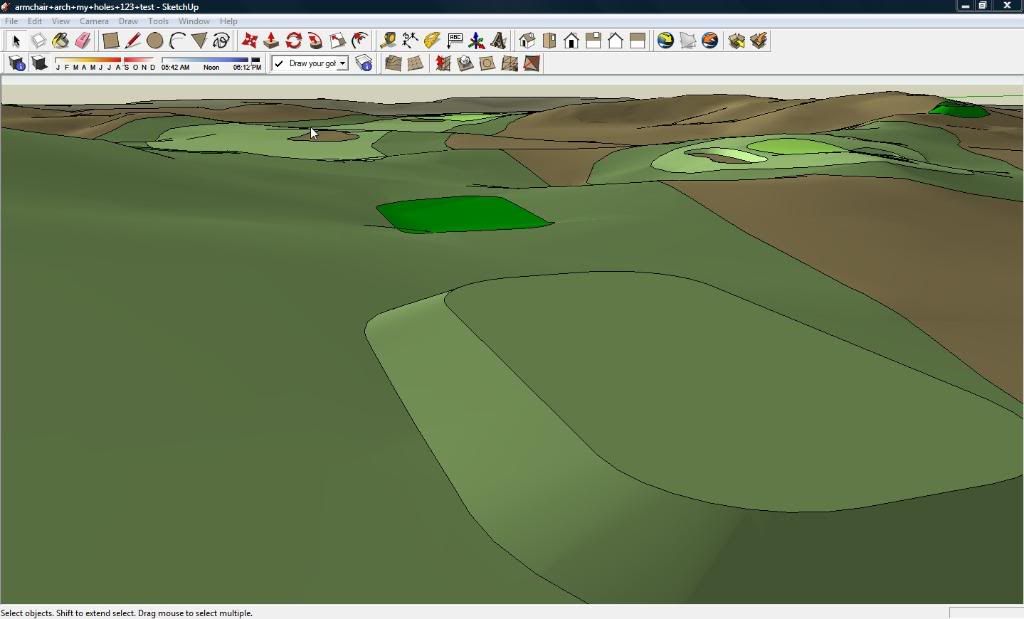
See the difference between this teebox and the next one up? One thing that does happen when you’ve already applied color to you project is that sketchup will screw it up. But you just fix this by doing what you did the first time. Also, the original teebox color is now on the reverse face, down underneath.

I’ll continue on in the next post, but you can use this same technique for bunkers, just offset down vertically instead of up.
« Last Edit: September 13, 2008, 05:08:56 PM by Charlie Goerges »
Severally on the occasion of everything that thou doest, pause and ask thyself, if death is a dreadful thing because it deprives thee of this. - Marcus Aurelius

Charlie Goerges

  • Karma: +0/-0
Re: It's time for some Armchair Architecture
« Reply #32 on: September 13, 2008, 11:36:12 PM »
Okay, a short follow-up to the previous for tees. For bunkers the process is the same up until here. So after choosing the Stamp tool and clicking on the bunker shape you should get a view like before (shown below).


Now this time type in “0” (zero) instead and hit enter. You should get an image like below.


Then, like before, click on the surface of the ground and wait for it to process. Then you should see something like this:


This time, drag downward until you are at the depth you would like for your bunker, then click again. Then right click on the ground and click edit group.

Next click on the floor of the bunker and choose the scale tool it should look like the image below.


Since the face you’ve chosen is below the surface, the bounding box is not visible, so you must orbit down underneath to edit it as shown below.


You’ll probably want to scale it down, because bunkers usually curve down in to a flatter bottom. You can uniform scale toward the opposite point by clicking and dragging, you can uniform scale about the center point by holding the control button while dragging, or you can free scale by holding the shift key. You should end up with something like the image below:


If you want to change the angle of the bunker floor, you can select it and then use the rotate tool as I have done below:


Then you just need to apply the colors you want and then make all the standard display changes.

The more complicated method of sculpting the bunkers is a lot more difficult, and I definitely won’t go into it here. But it involves displaying the hidden geometry and making very specific adjustments. There is one more tutorial I’ll try to do soon for the green, it’s very easy, and will keep your original contours while letting you raise the green an create a roll-off.

Also, I recommend trying the Smoove tool, especially if you want to do earthmoving before draping your designs onto the surface.

All the best,

Charlie
Severally on the occasion of everything that thou doest, pause and ask thyself, if death is a dreadful thing because it deprives thee of this. - Marcus Aurelius

Ian_L

  • Karma: +0/-0
Re: It's time for some Armchair Architecture
« Reply #33 on: September 14, 2008, 01:25:26 AM »
So how exactly did you get those outlines in the air (step 1)?

Charlie Goerges

  • Karma: +0/-0
Re: It's time for some Armchair Architecture
« Reply #34 on: September 14, 2008, 01:50:45 AM »
I just unhid my original 2D drawings (the ones you drape onto the terrain), select them, then right-click and choose "explode" from the popup menu. then I delete a line segment, and then re-connect it, then sketchup will create the face.  Let me know if you need any other info.

Take it easy,

Charlie
Severally on the occasion of everything that thou doest, pause and ask thyself, if death is a dreadful thing because it deprives thee of this. - Marcus Aurelius

Ian_L

  • Karma: +0/-0
Re: It's time for some Armchair Architecture
« Reply #35 on: September 14, 2008, 01:54:24 AM »
Strange, I only have the option of "hiding" them, at which point everything (including terrain) disappears.

Charlie Goerges

  • Karma: +0/-0
Re: It's time for some Armchair Architecture
« Reply #36 on: September 14, 2008, 02:01:03 AM »
Hey, page two, nice.

Anyway, the problem you're running into is a general one with sketchup. The way layers and groups work is not very intuitive. You may need to go to Edit > Unhide > All. Unfortunately when you do that you'll probably unhide some various other things like contour lines etc. you should be able to just re-hide that stuff.

Charlie

P.S. Your new thread idea is looking ever more attractive. Maybe consolidate instruction-type stuff here, and a new thread for actual golf hole images only. Of course a separate thread makes more sense if more than 2 or 3 people submit some images.
« Last Edit: September 14, 2008, 02:04:43 AM by Charlie Goerges »
Severally on the occasion of everything that thou doest, pause and ask thyself, if death is a dreadful thing because it deprives thee of this. - Marcus Aurelius

Ian_L

  • Karma: +0/-0
Re: It's time for some Armchair Architecture
« Reply #37 on: September 14, 2008, 02:11:20 AM »
I think if we make a new thread just for the golf holes more people will be inclined to look through them, since they won't have to look through your (great) tutorials. 

Thanks for the suggestion, I got around it by going back to my previously saved version (before the drape), but it looks like your way will work great as well.  I'll keep you posted on the results.

Ian_L

  • Karma: +0/-0
Re: It's time for some Armchair Architecture
« Reply #38 on: September 14, 2008, 03:02:50 AM »
After I edit a bunker, I can't seem to be able to reselect the lines suspended in the air (all the lines go gray).  This seems to happen after I click "edit group" in the bunker floor.

EDIT: found a solution.  I put a floating object at an angle so that there is only sky behind it, then right click and select "close group."
« Last Edit: September 14, 2008, 03:44:31 AM by Ian_Linford »

Jim Colton

Re: It's time for some Armchair Architecture
« Reply #39 on: September 14, 2008, 03:45:35 PM »
Charlie,

  I've had some luck with the draping, placing the shape of the hole onto the terrain, but then I can't seem to paint the shapes once they are on the terrain.  Which level should I be drawing on and which should I be draping to?

  Jim


Ian_L

  • Karma: +0/-0
Re: It's time for some Armchair Architecture
« Reply #40 on: September 14, 2008, 06:01:26 PM »
New problem. :P

Some of my bunker edges are unpaintable.  The face has a bluish color, and it doesn't react to my fill attempts:


Charlie Goerges

  • Karma: +0/-0
Re: It's time for some Armchair Architecture
« Reply #41 on: September 14, 2008, 07:07:32 PM »
Jim:

Once you get the shapes draped, you just have to select the pointer tool and then right-click on the terrain and click "Edit Group". Now when you select a color from the material palette you should be able to apply colors only to areas bound by the lines you draped.

Ian:

I am not quite sure yet about your issue. If you like, you could email me the file, though when I am next in sketchup I'll see what I can figure out.

Charlie
Severally on the occasion of everything that thou doest, pause and ask thyself, if death is a dreadful thing because it deprives thee of this. - Marcus Aurelius

Tags:
Tags:

An Error Has Occurred!

Call to undefined function theme_linktree()
Back